

How to Create an Email Signature in Outlook
How to Create an E-mail Signature in Outlook
This article will provide you with instructions on how to create an e-mail signature in Outlook.
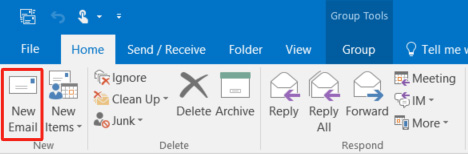
Step 1) In Outlook, click New Email to bring up a new email window.
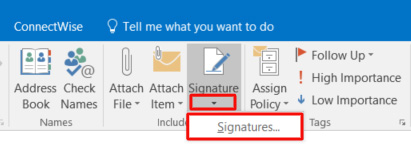
Step 2) Click the arrow below Signature and select Signatures… from the dropdown menu.
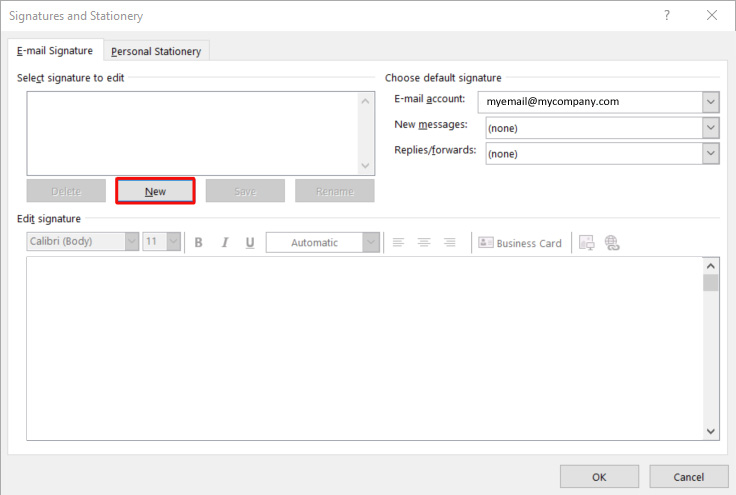
Step 3) The Signatures and Stationery window will appear. Click New.
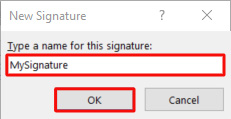
Step 4) You will be prompted to type in a name for the signature. Enter the desired name and click OK.
Note: Outlook allows you to create multiple signatures. This allows you to create different signatures for the type of email you are composing, such as a new email or replies/forwards.
Step 5) Highlight the signature name in the Select signature to Edit section. Then, create the signature in the Edit signature section.
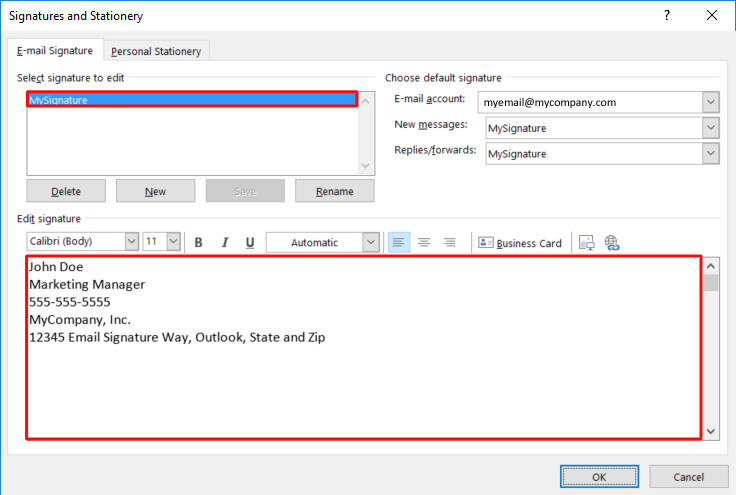
Step 6) Go to the Choose a default signature section and assign the desired signature(s) to be automatically added to all new emails and emails that you reply to/forward.

Step 7) Once you have the signature(s) created and desired settings in place, click OK.

You have now successfully created an email signature in Outlook!


