

How To Take Screenshots
How To Take A Screenshot
The following information will instruct you on how to take a screenshot. The instructions were created using Windows 10 OS. However, the same instructions apply to other Windows OS versions.
This guide provides two different options for taking a screenshot.
- Using a Keyboard Command
- Using the Snipping Tool application
Using a Keyboard Command (Alt + PrtSc keys) to take a screenshot:
Step 1) Select and bring the desired window/object into view.
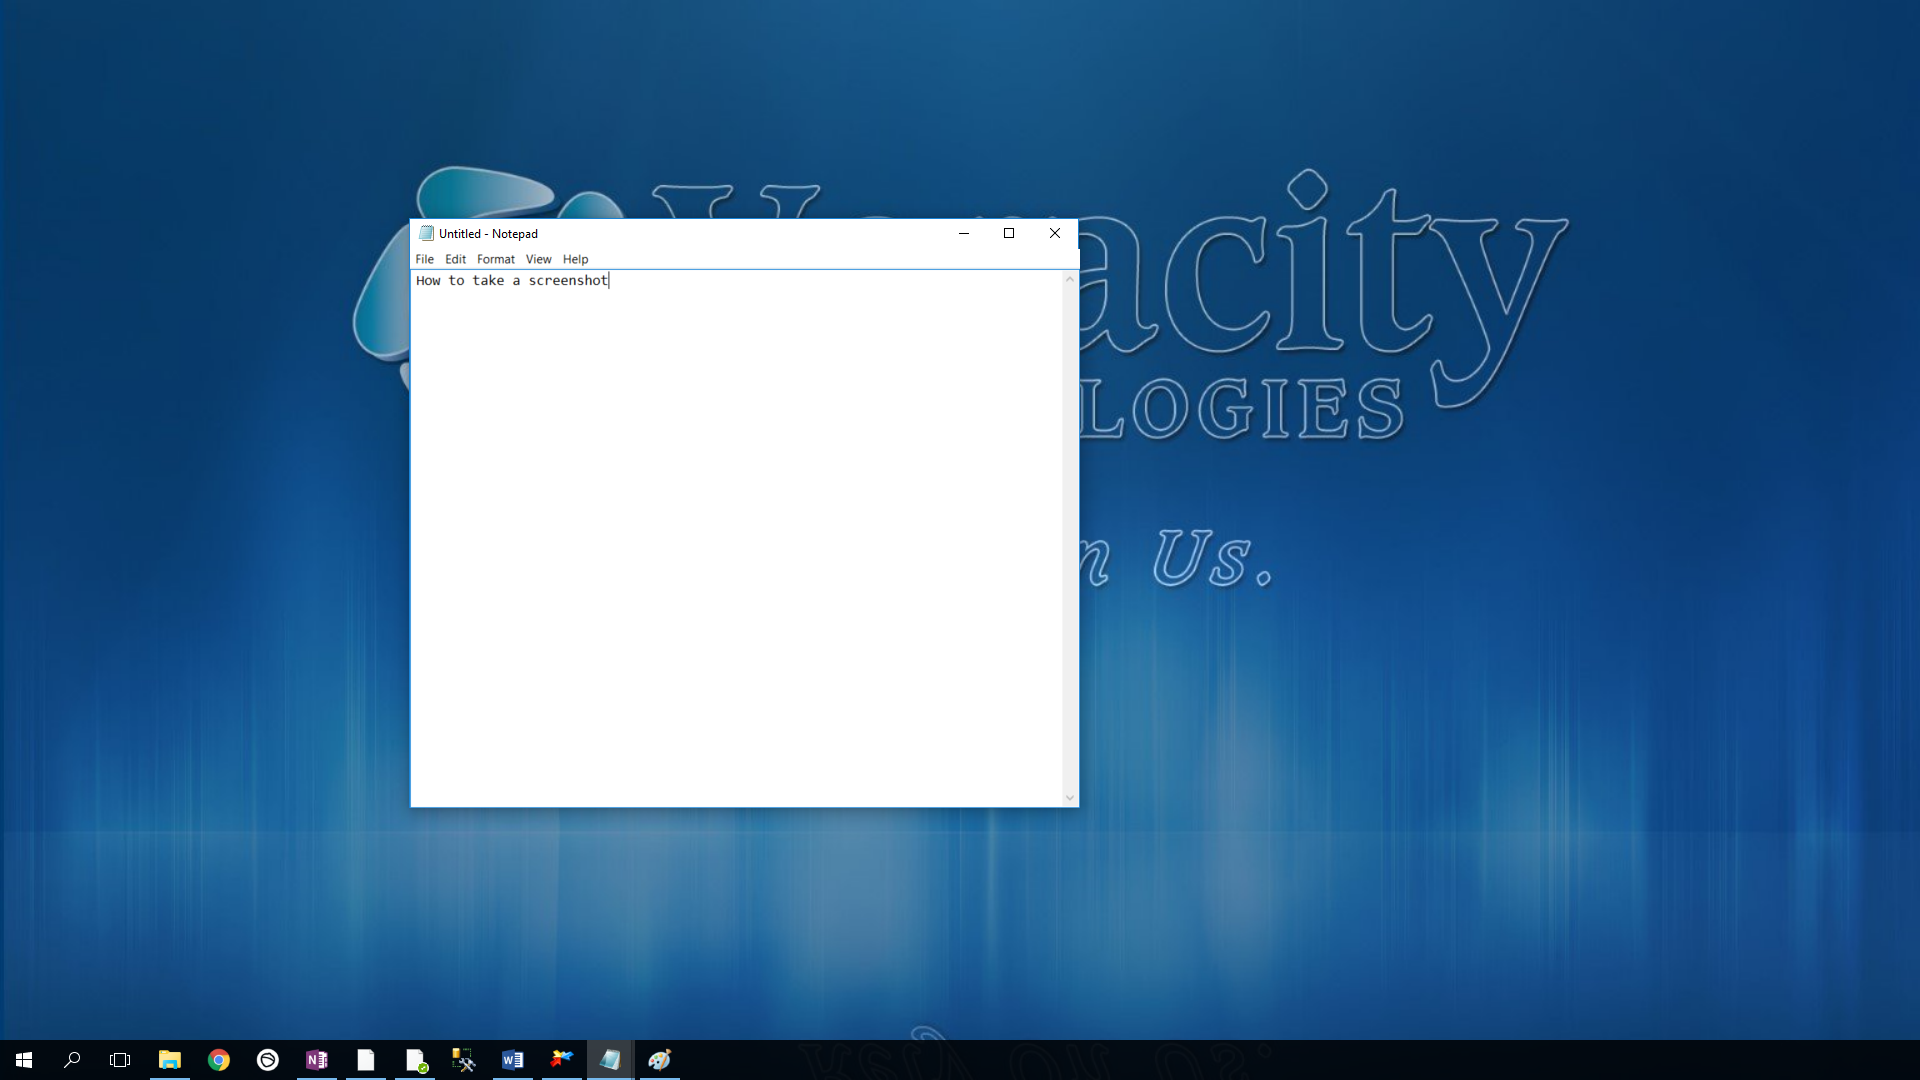
Step 2) Press the Alt+PrtSc (Print Screen) keys to take a screenshot.
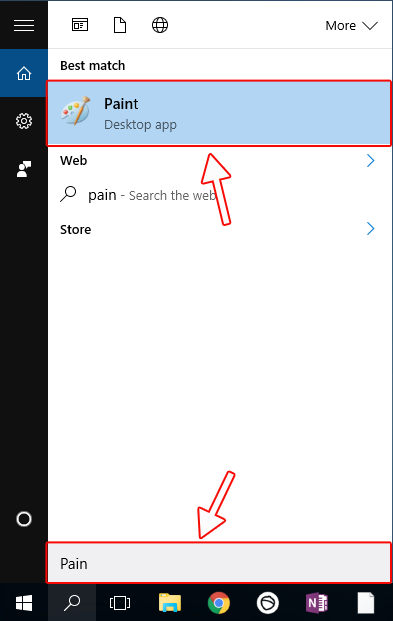
Step 3) Go to the Start menu and type Paint into the search bar. Select and open the Paint application.
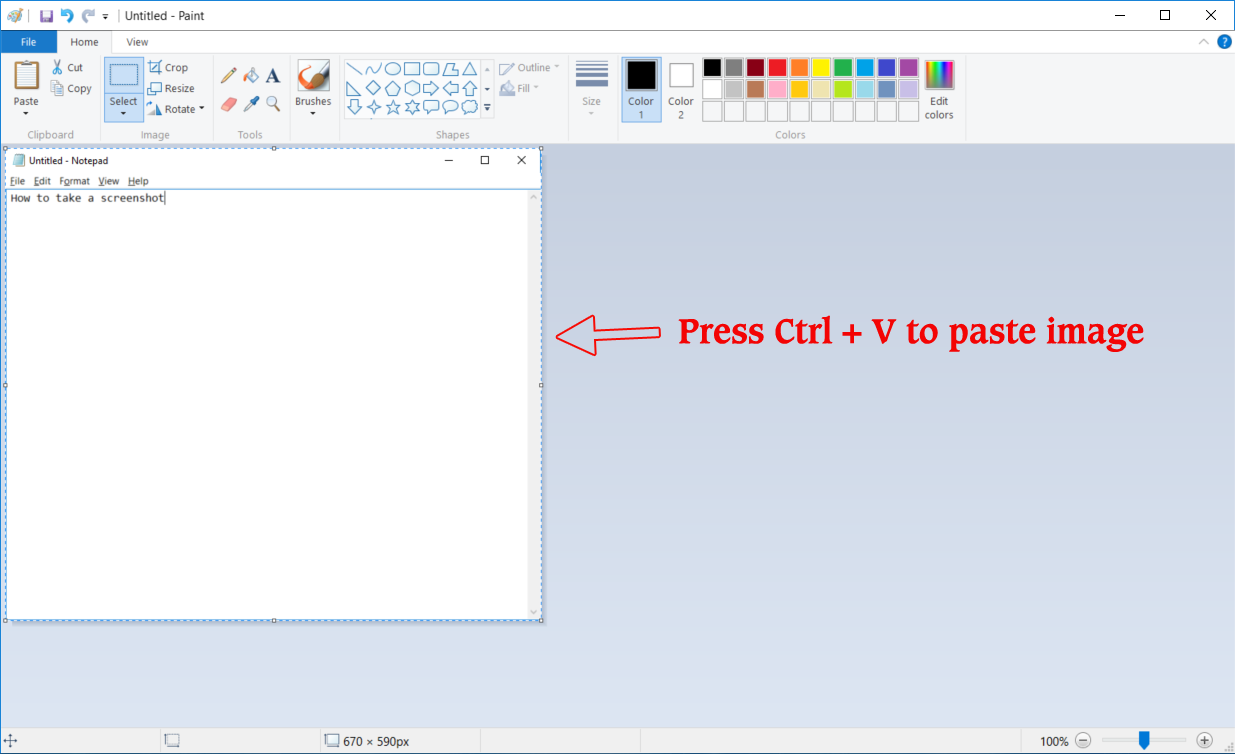
Note: if you do not need to save a copy of the image, you can simply paste the image directly into the desired document/email. Skip the remaining steps, go to the document/email and press Ctrl+V to paste into the desired location.
Step 4) Once in the Paint application, press Ctrl+V to paste the image.
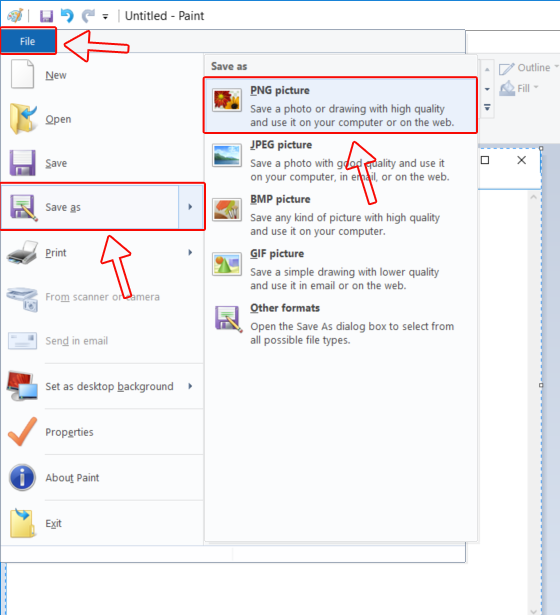
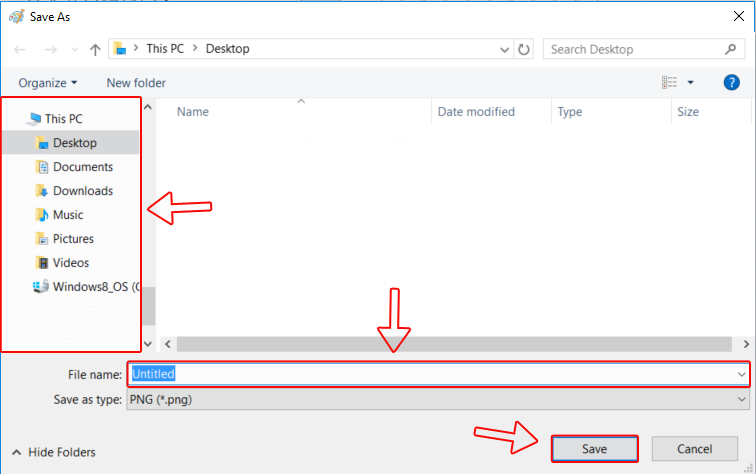
Step 5) Once pasted, go to the File menu and select Save As. Then, select a file format for the image (PNG, JPEG, BMP, etc.)
Step 6) Give the image a file name, select a deisred location to save the file and click Save.
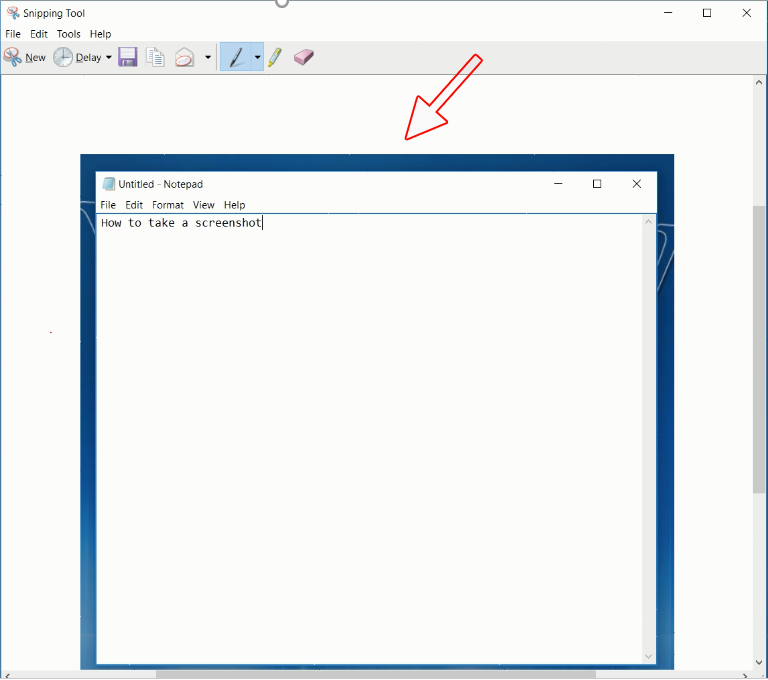
Using the Snipping Tool application to take a screenshot:
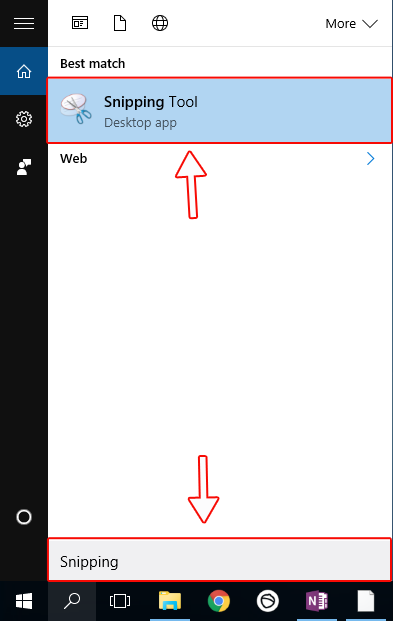
Step 1) Go to the Start menu and type Snipping Tool in the search bar.
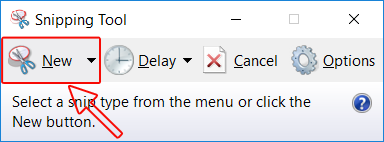
Step 2) Once the Snipping Tool application opens, select New.
Note: You can choose the following options for capturing by clicking the dropdown arrow next to New:
- Free-form snip
- Rectangular snip
- Window snip
- Full Screen snip
Step 3) Click and drag your mouse to outline the desired area that you would like to capture in your screenshot.
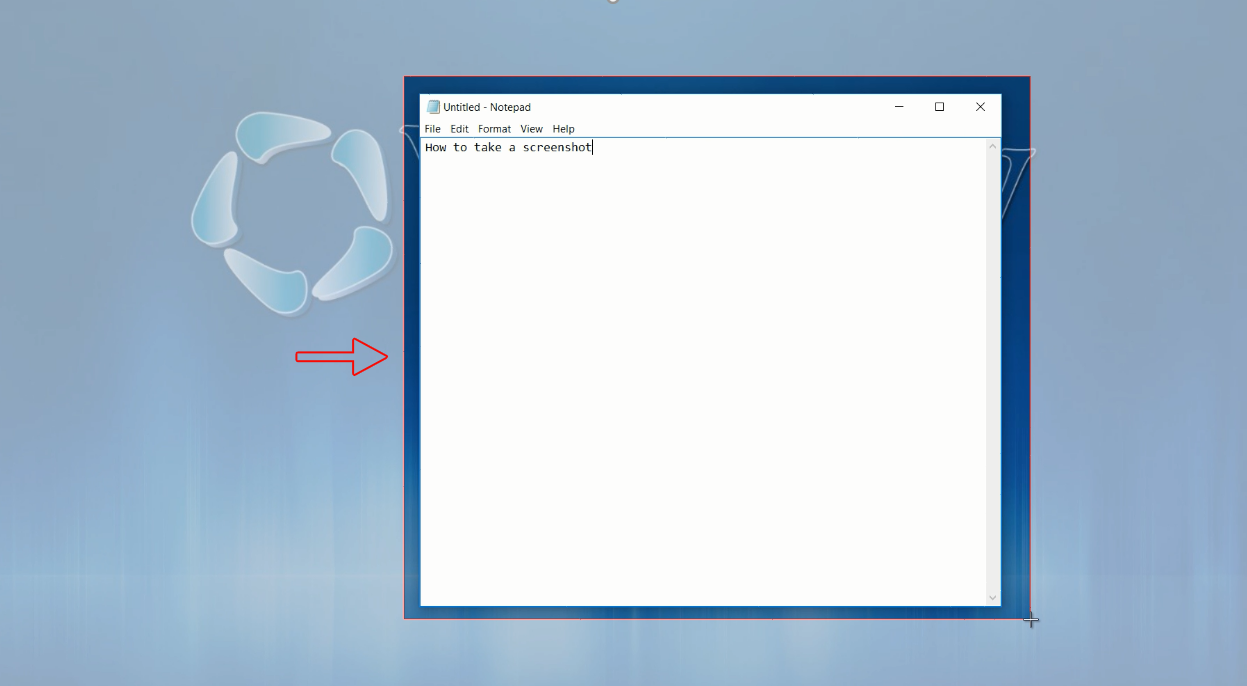
Step 4) Once you release the mouse (in Step 3), you will see a preview of your screenshot.
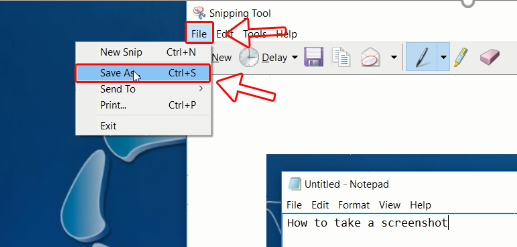
Step 5) To save the screenshot, go to the File menu and select Save As.
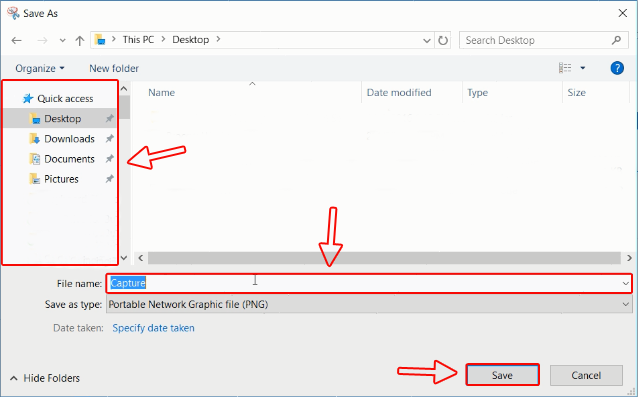
Step 6) Give the image a file name, select a desired location to save the file to and click Save.
Congratulations! You have now successfully taken a screenshot!


